

Key Takeaways
Why Fluid Checks Matter — and How Often to Do Them
Modern vehicles are engineered to run reliably, but they depend on a handful of fluids being at the right level and in good condition. Engine oil lubricates moving parts, coolant prevents overheating, brake fluid transfers pedal force to your brakes, power steering fluid (where applicable) reduces steering effort, and washer fluid keeps your windshield clear. Neglect any of these and you risk anything from reduced performance to a preventable breakdown or a safety issue on the road.
The good news: checking these fluids is genuinely straightforward. You don't need mechanical expertise or special equipment. Most drivers can complete all five checks in under 20 minutes using only a rag, their owner's manual, and a flat driveway. This is one of the most practical things you can do as a car owner to stay ahead of problems. For a broader maintenance picture, see our seasonal maintenance guide, which covers what to inspect as conditions change throughout the year.
Build a Monthly Under-Hood Habit
Spending 15 minutes once a month checking all five fluids gives you an early-warning system against breakdowns. Pair it with a regular fuel stop or the first of each month to make it a habit. Over time, you'll quickly spot what's normal for your vehicle and notice changes early.
What You'll Need Before You Start
No specialist tools are required, but having a couple of items on hand makes the process cleaner and more accurate. Your owner's manual is the most important resource — it maps out where each reservoir sits in your specific engine bay and specifies which fluid types are compatible with your vehicle. Using the wrong fluid in the wrong reservoir can cause damage, so this step matters.
What you will need
Owner's Manual
Identifies the location of each fluid reservoir and the correct fluid type for your specific vehicle.
Lint-free rag or paper towels
Used to wipe dipsticks clean before taking an accurate reading.
Flashlight or phone torch
Helps you see fluid levels and color clearly in low-light engine bay conditions.
Nitrile gloves
Protects hands from contact with brake fluid, coolant, and other chemicals that can irritate skin.
If you drive an older vehicle, also take a look at our guide on maintenance tasks commonly overlooked on older vehicles — higher-mileage cars sometimes have additional fluid considerations worth knowing about.
Step-by-Step: Checking Each Fluid
Work through the steps below in order. If you find any fluid is low, discolored, or has an unusual smell or texture, note it and cross-reference with your owner's manual. Minor top-ups of washer fluid or coolant (using the correct product) are typically safe to handle yourself. For anything involving brakes or an unexpected drop in oil level, schedule a mechanic visit rather than simply topping up and driving on.
Prepare your vehicle safely
Park on a flat, level surface and switch off the engine. For accurate readings, most fluid checks should be performed on a cold or warm (not hot) engine — allow at least 10 minutes after driving before opening the hood. Pop the hood using the interior release lever, then secure it with the hood prop if your vehicle doesn't have a hydraulic strut. Put on gloves if you have them.
Check the engine oil
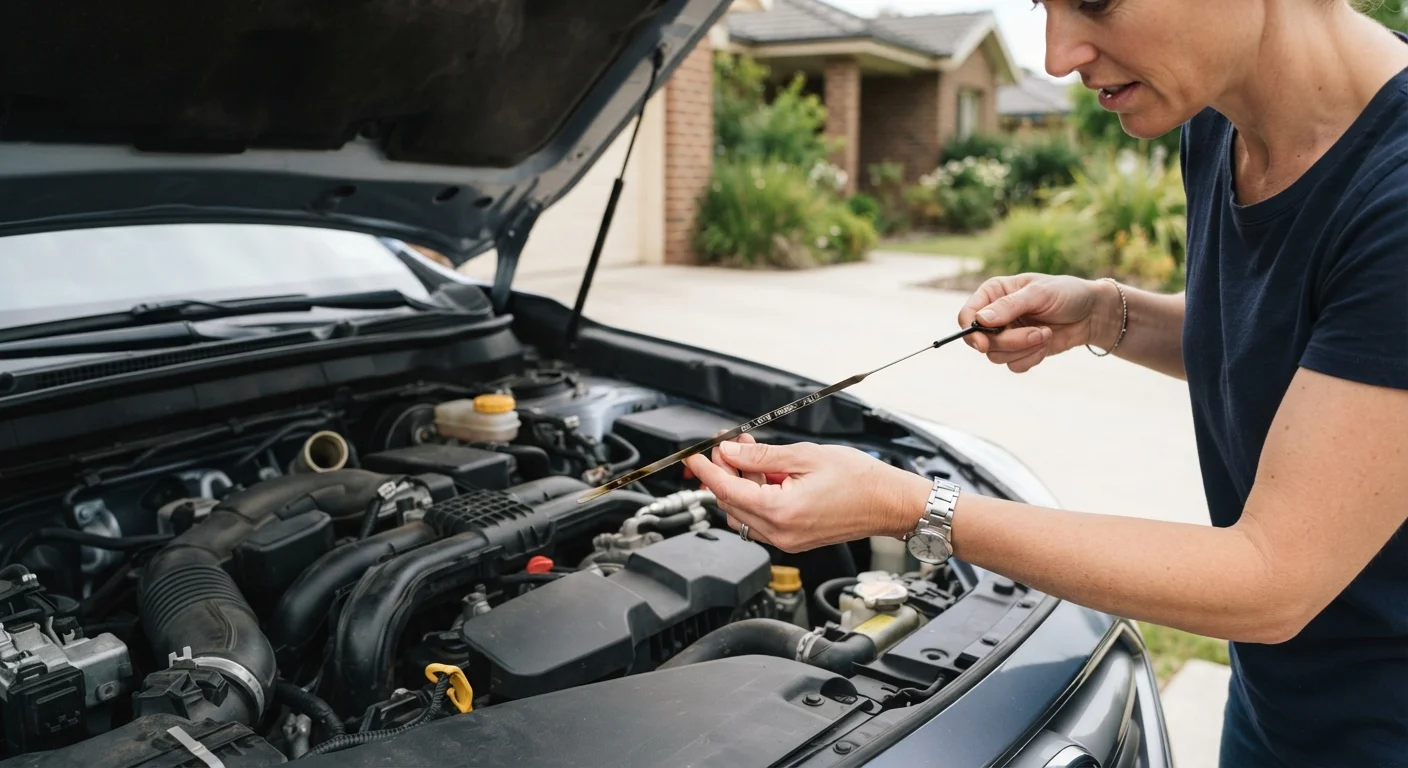
Locate the oil dipstick — usually a brightly colored handle near the center of the engine. Pull it out fully, wipe it clean with a rag, reinsert it completely, then withdraw it again. Note where the oil sits on the dipstick: it should fall between the MIN and MAX markers. Also observe the oil's color — fresh oil is amber, while very dark or gritty oil signals it's due for a change. If it appears milky or foamy, consult a mechanic promptly, as this can indicate coolant mixing with oil.
Check the coolant (antifreeze) level
The coolant reservoir is a translucent plastic tank usually located near the radiator. Without opening any caps, read the level against the MIN and MAX lines marked on the outside of the tank. The fluid should be visible between those markers. Coolant is typically green, orange, or pink depending on the type your vehicle uses. A consistently low coolant level may indicate a leak and warrants a mechanic inspection.
Check the brake fluid
The brake fluid reservoir is a small translucent container near the firewall (the partition between the engine bay and the cabin), typically on the driver's side. Check the level against the MIN/MAX lines without opening it. Brake fluid naturally darkens with age and moisture absorption — very dark fluid may need replacing. If the level is noticeably low, have a mechanic inspect your brakes before driving further, as this can indicate worn brake pads or a leak in the braking system.
Check the power steering fluid
Many modern vehicles use electric power steering and have no fluid to check — your owner's manual will confirm this. If your car has hydraulic power steering, locate the reservoir (often marked with a steering wheel icon) and check the level against the markings on the side or dipstick built into the cap. The fluid should be clear to light amber. A low level or dark, burnt-smelling fluid can point to a leak or degraded fluid.
Check the windshield washer fluid
The washer fluid reservoir is usually a blue-capped container that is straightforward to locate. Remove the cap and visually check the level — there's no harm in topping this one up yourself using a pre-mixed washer fluid rated for your climate. In winter regions, use a freeze-resistant formula to prevent the lines from freezing. This is the one fluid check where running low has an immediate and obvious consequence: a smeared, dirty windshield that reduces visibility.
Low Brake Fluid Warrants Immediate Attention
Unlike other fluids, brake fluid doesn't typically "burn off" during normal operation. A noticeably low brake fluid level often signals worn brake pads or a leak somewhere in the braking system. If you find the level significantly below the MIN mark, do not continue driving without having the system inspected by a qualified mechanic. Braking performance is not something to gamble with.
Before any significant drive, it's also worth running through a broader pre-trip check. Our driver's pre-trip walkround guide covers tyres, lights, and load security alongside fluids — a useful companion to this checklist.
What Abnormal Fluid Looks Like — and When to Call a Mechanic
Knowing what normal looks like makes it easier to spot a problem early. Engine oil should be amber and slightly translucent when new, darkening gradually with use — dark oil alone isn't always cause for alarm, but a milky appearance suggests water or coolant contamination and requires prompt attention. Coolant should be brightly colored and clean. Brake fluid ranges from clear to pale yellow when fresh; very dark or murky fluid has degraded and may need flushing.
Identify Fluid Leaks Before They Escalate
If you notice a puddle under your parked car, the color and location can offer clues: oily dark spots near the front suggest an engine oil leak, bright green or orange near the front points to coolant, and clear fluid near a wheel could indicate brake fluid. Any suspected fluid leak should be assessed by a mechanic promptly — don't wait for a warning light.
As a general rule: if a fluid level drops between your monthly checks without an obvious explanation (such as a top-up you did yourself), that's worth investigating. Fluids don't vanish — a recurring low level points to a leak or consumption issue that a mechanic should assess. For a structured pre-departure review before long trips, see our car readiness checklist for road trips.