

Key Takeaways
Option A
Drywall
The modern, widely accessible wall system.
Best for: Homeowners renovating, building new, or tackling DIY repairs on a reasonable budget and timeline.
Option B
Plaster
The traditional, durable wall system found in older homes.
Best for: Homeowners preserving historic character or dealing with repairs in pre-1950s construction.
If you're renovating a post-1960s home and want straightforward repairs
Drywall
Drywall patches are achievable as DIY projects with widely available materials, and replacements are cost-effective and quick.
If you're preserving the character of a historic pre-war home
Plaster
Matching plaster maintains the wall's original density, sound qualities, and period-appropriate finish that drywall cannot fully replicate.
If you need superior soundproofing between rooms
Plaster
The density and thickness of multi-coat plaster reduces sound transmission more effectively than standard drywall panels.
If you want to tackle wall repairs yourself without specialized skills
Drywall
Drywall repair requires common tools and techniques that most determined DIYers can learn from widely available guidance.
How Each System Is Built
Understanding what's behind your walls starts with knowing how each system is constructed — they share almost nothing beyond a painted surface.
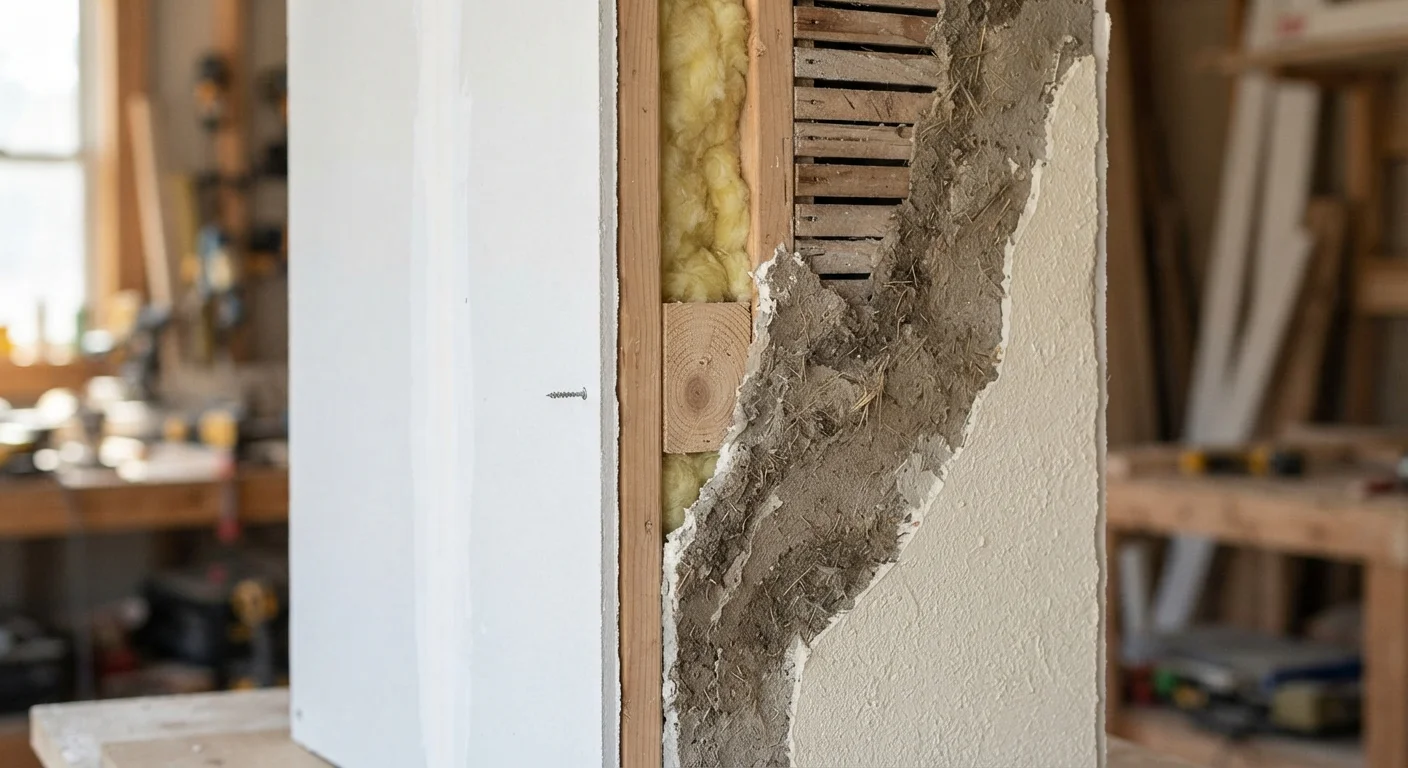
Drywall (also called gypsum board or sheetrock as a generic term) is a manufactured panel: a gypsum plaster core pressed between two sheets of paper. Panels are cut to size, screwed to wall studs, and finished with joint compound — a spreadable paste used to tape seams and conceal fasteners. After drying and sanding, the surface is primed and painted. The entire process is fast by construction standards and requires no wet mixing or extended curing time.
Plaster is a built-up, wet-applied system. In most older American homes, it was applied in three coats — a scratch coat, a brown coat, and a finish coat — over a base of thin wooden strips called lath, or later over metal mesh. Each coat requires drying time before the next is applied. The result is a wall that is typically ¾ to 1 inch thick and extremely hard. Skilled plasterers could create remarkably smooth or decorative surfaces that drywall cannot match without additional work.
| Criterion | Drywall | Plaster |
|---|---|---|
| Typical home era | 1950s to present | Pre-1950s construction |
| Wall thickness | ½ inch panel | ¾–1 inch multi-coat |
| Installation method | Screw panels, tape seams | Hand-applied wet coats over lath |
| Sound insulation | Moderate | Notably better due to density |
| DIY repairability | Straightforward for most people | Difficult; often needs a tradesperson |
| Hardness | Softer; dents and holes easily | Very hard; resists denting |
| Hanging hardware | Standard drywall anchors work well | Requires toggle bolts or pre-drilling |
If you're curious how wall structure relates to your home's overall framework, see our guide to load-bearing walls for context on how walls are supported.
How to Tell Which System You Have
Most homeowners can identify their wall type with a few simple checks — no tools needed.
- Age of the home: Homes built before roughly 1950 almost certainly have plaster. Widespread drywall adoption began in the 1950s and became dominant by the 1970s.
- The knock test: Plaster sounds dense and solid when tapped. Drywall sounds slightly hollow, especially between studs.
- The nail or pin test: Push a thumbtack into an inconspicuous area. Drywall accepts it with light pressure and a small pop. Plaster resists, often crumbling slightly or requiring real force.
- Look at cracks: Plaster develops thin, spidery hairline cracks in irregular patterns. Drywall damage tends to appear as straight cracks along seams or larger holes where the panel dents or breaks cleanly.
- Check an outlet box: Remove a face plate and look at the wall thickness at the edge of the electrical box. Plaster walls are noticeably thicker.
When You're Not Sure — Ask Before You Cut
If you're planning a renovation that involves cutting into walls, it's worth confirming your wall type before you start. Cutting into plaster without preparation creates significantly more mess and structural disruption than cutting drywall. When in doubt — especially in older homes — consult a contractor who has experience with the wall system you have. Unexpected discoveries (like wire lath, horsehair plaster, or asbestos in very old textured finishes) are more common in pre-1960s construction and warrant professional assessment.
Repairs: Effort, Cost, and Realism
This is where the two systems diverge most sharply for homeowners.
Drywall repair scales well. Small holes can be patched with pre-made mesh patches and a few coats of joint compound. Larger sections can be cut out and replaced with a new piece of drywall, taped, and finished. With patience and good surface prep, repairs can blend invisibly. Most repairs are achievable as careful DIY projects.
Plaster repair is more demanding. Small cracks can be filled with plaster patching compound, but matching the texture and hardness of original three-coat plaster is genuinely difficult. Large repairs — anything beyond a hairline — often require a plasterer who knows the material, because improperly applied patches may not bond well, may crack further, or may not accept paint the same way. Blending old and new plaster invisibly is a skilled trade task.
~1950
Year drywall began replacing plaster widely
Drywall gained widespread adoption in American residential construction after World War II, largely due to faster installation and lower labor costs.
3 coats
Layers in traditional three-coat plaster
Traditional plaster walls required a scratch coat, brown coat, and finish coat — each needing to dry before the next was applied, extending construction timelines significantly.
One option when plaster damage is extensive is to skim-coat over it with a thin layer of joint compound, or to cover large damaged sections with a layer of thin drywall — sometimes called a plaster washcoat or blueboard system. This is a common approach in renovations that want to preserve wall mass without full plaster restoration.
Working With Each System Day to Day
Beyond repairs, knowing your wall type affects routine tasks.
Hanging items: Plaster requires care with anchors — standard drywall anchors often don't work well because the material is harder and more brittle. Use toggle bolts or masonry-style anchors, and always pre-drill. Drywall anchors are designed for drywall's specific density and work reliably in it.
Running wires or pipes: Plaster walls are more difficult to fish wires through because of their thickness and rigidity. Cutting into plaster also generates fine dust and debris. Drywall is easier to cut, patch, and close up. Either way, work near electrical systems should always be evaluated by a licensed electrician.
Moisture behavior: Both systems are vulnerable to moisture, but in different ways. Drywall's paper facing can mold when wet; plaster, being denser, is more resistant to moisture migration but can eventually delaminate if chronically damp. Neither is a moisture barrier — that job belongs to proper vapor barriers and waterproofing behind the wall.
Knowing your wall system is one piece of understanding your home as a whole. For a broader look at how your home's structure holds together, our overview of load-bearing walls is a useful companion read.